Installation
Server Requirements
For server requirements, please refer to the Server Requirements page.
Hosting (cPanel Recommended)
You can use any hosting provider as long as it meets the server requirements. cPanel is not required, but we recommend cPanel-based hosting because it’s the easiest option to manage (database creation, file uploads, SSL, cron jobs, etc.).
What if I don't have cPanel?
No problem — BrainScore will work with any control panel (Plesk, DirectAdmin, CyberPanel, aaPanel, etc.) or even a server you manage yourself. The installation steps are the same; only the UI/screens for creating a database and uploading files may look different.
Support note: Our free support is limited to cPanel-based hosting. We’ll still do our best to help with general guidance on other panels, but we may not be able to provide step-by-step instructions for every control panel.
Installation Steps
BrainScore comes with a prebuilt installer. Follow these steps to install BrainScore on your server.
Creating a New Database
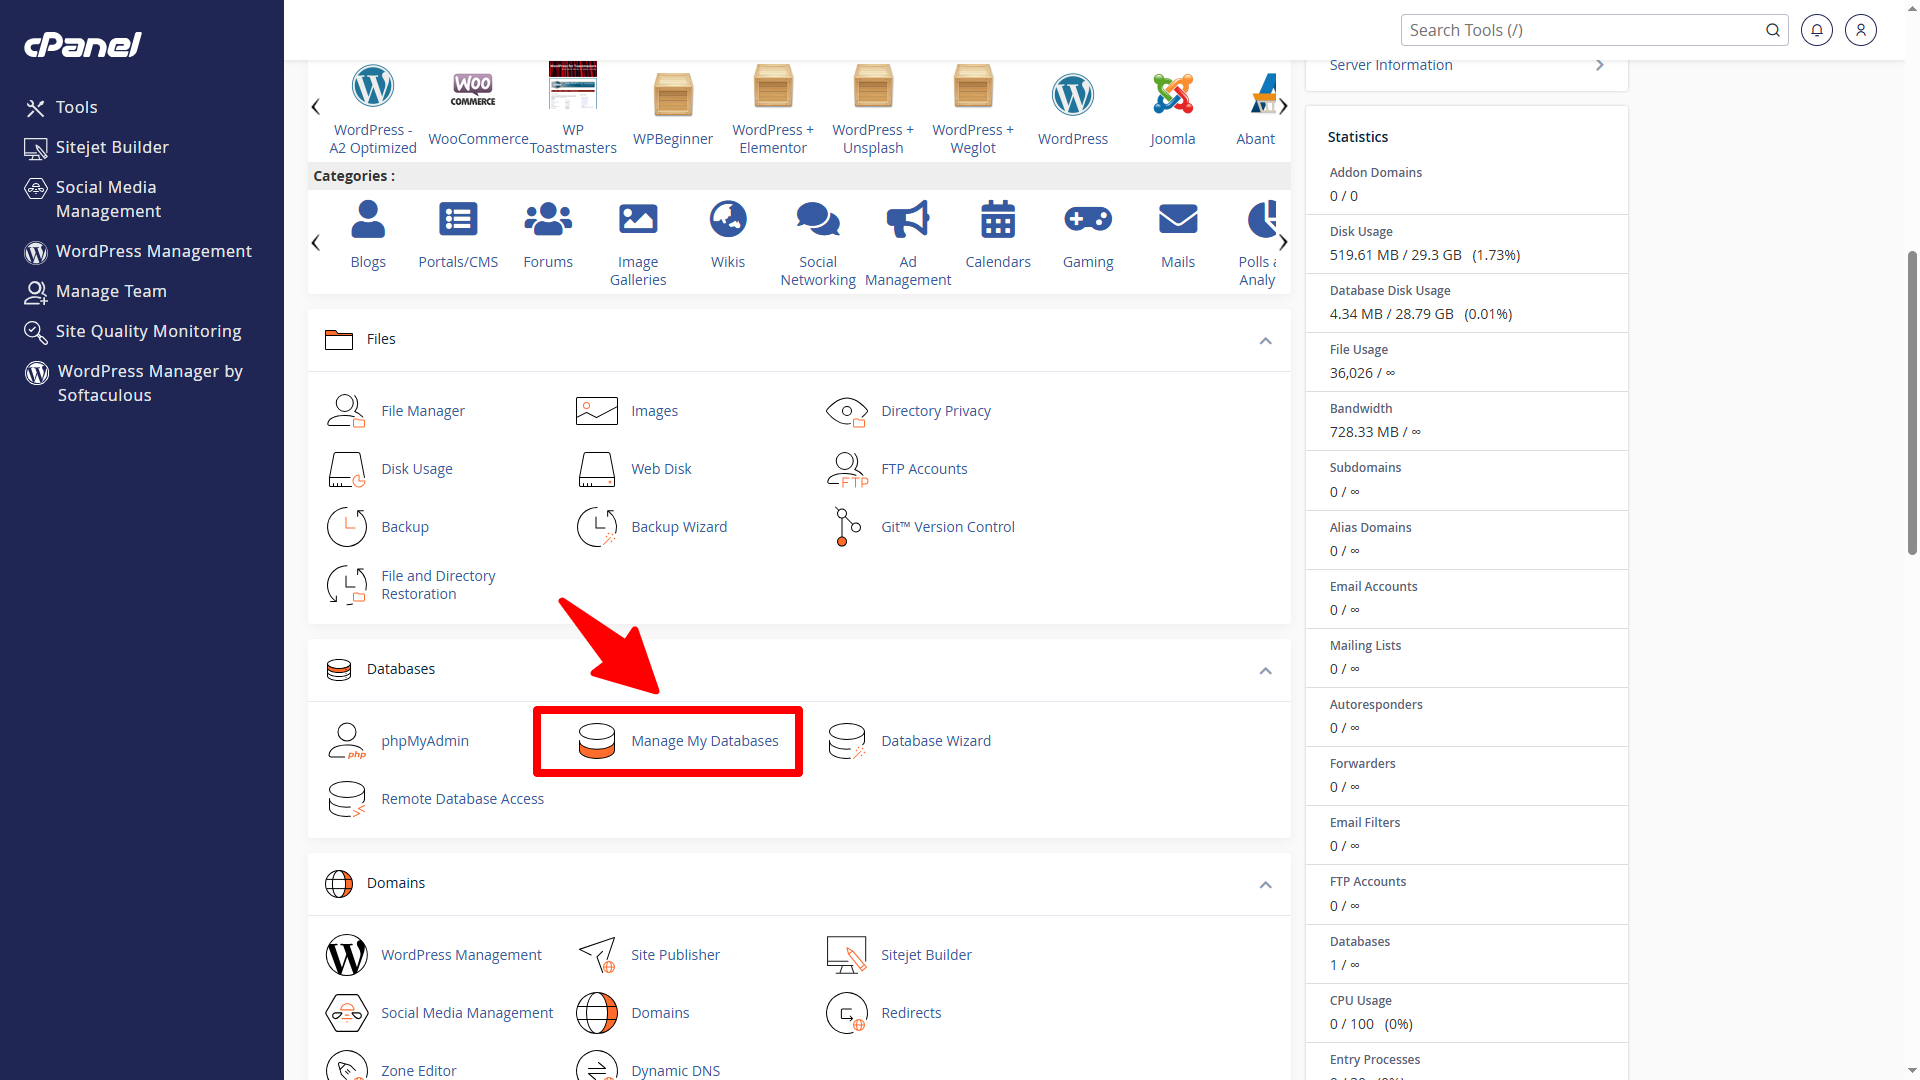
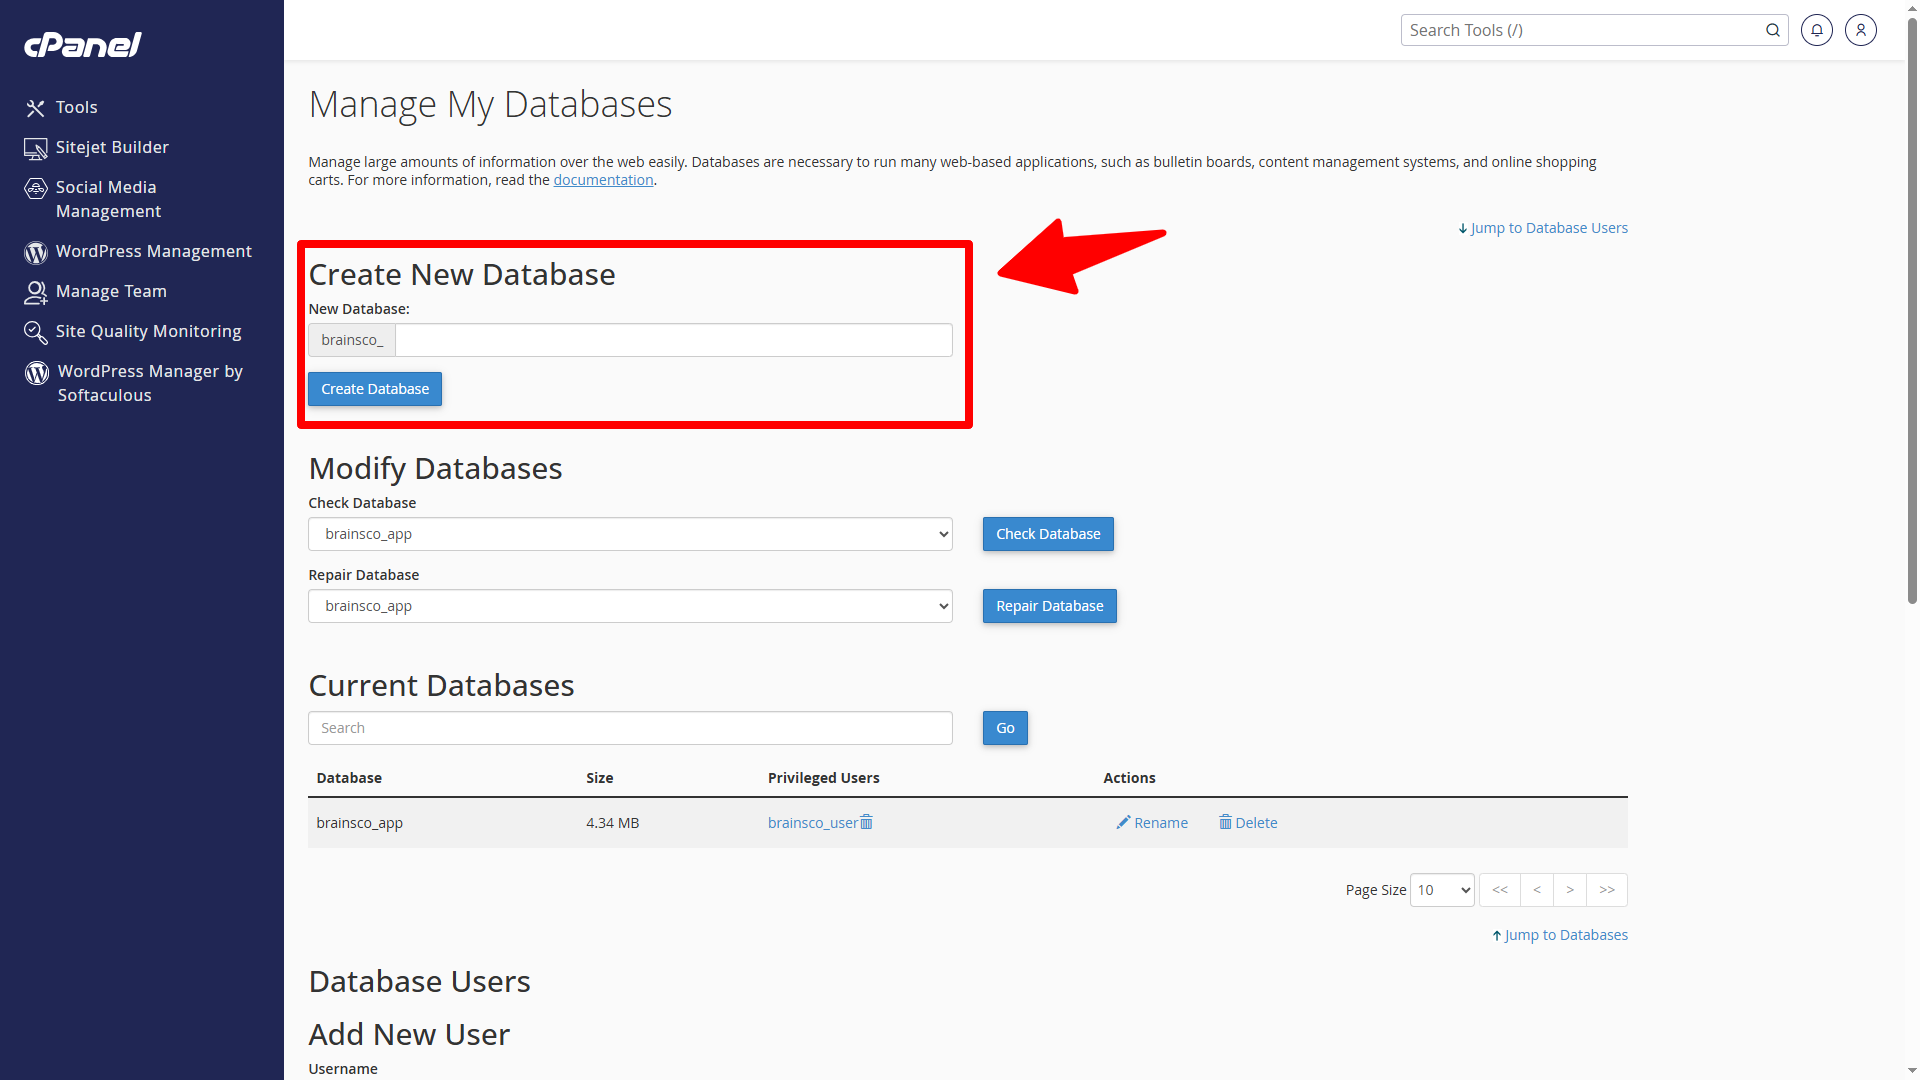
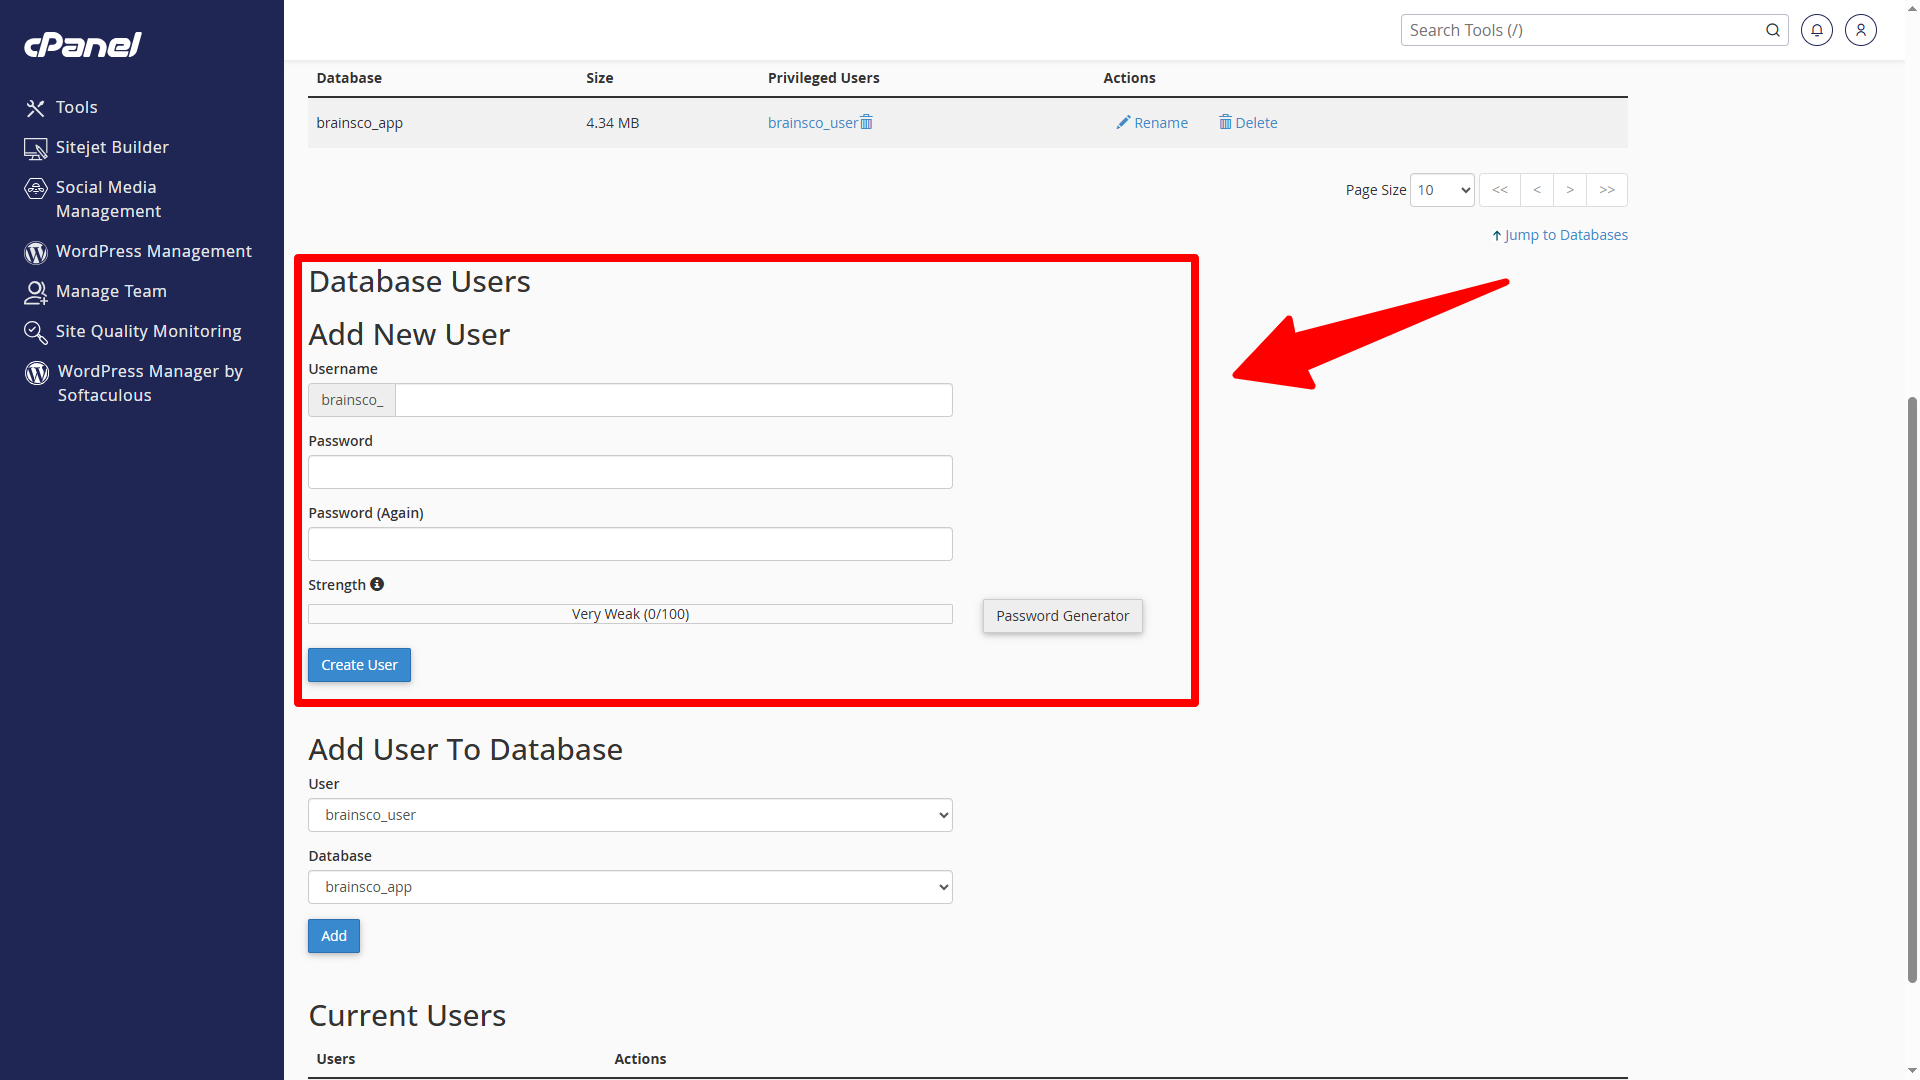
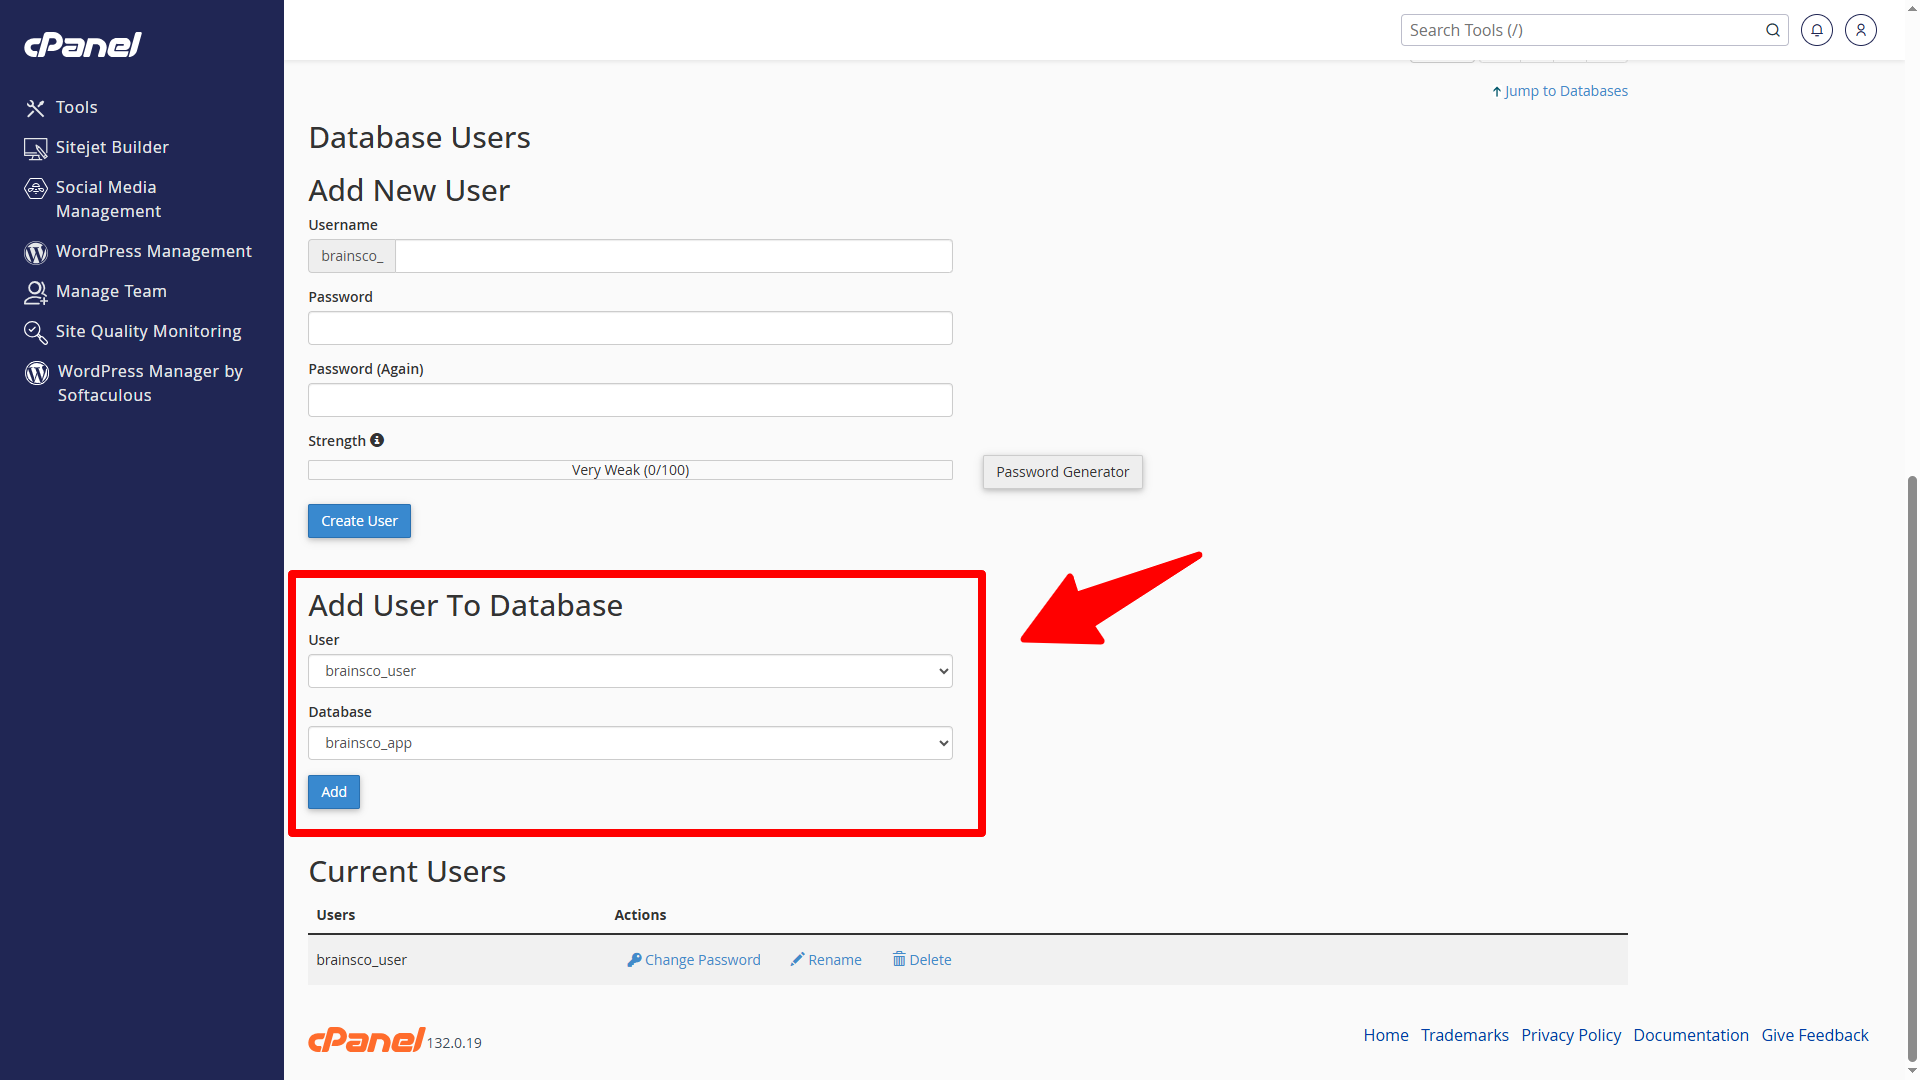
Before installing, you will need to create a new database. If you already know how to do this or have already created one, skip to the next step. In most cases you should be able to create a database from your cPanel:
Uploading Files
-
Prepare the package. Extract the archive you downloaded from CodeCanyon. From the extracted contents, use only the Script.zip file for deployment.
-
Upload to the server. Upload Script.zip to your web root (commonly named
www,public_html, orhtml) or to the subdirectory where you want BrainScore to run. You may use FTP, SFTP, or your hosting control panel’s file manager.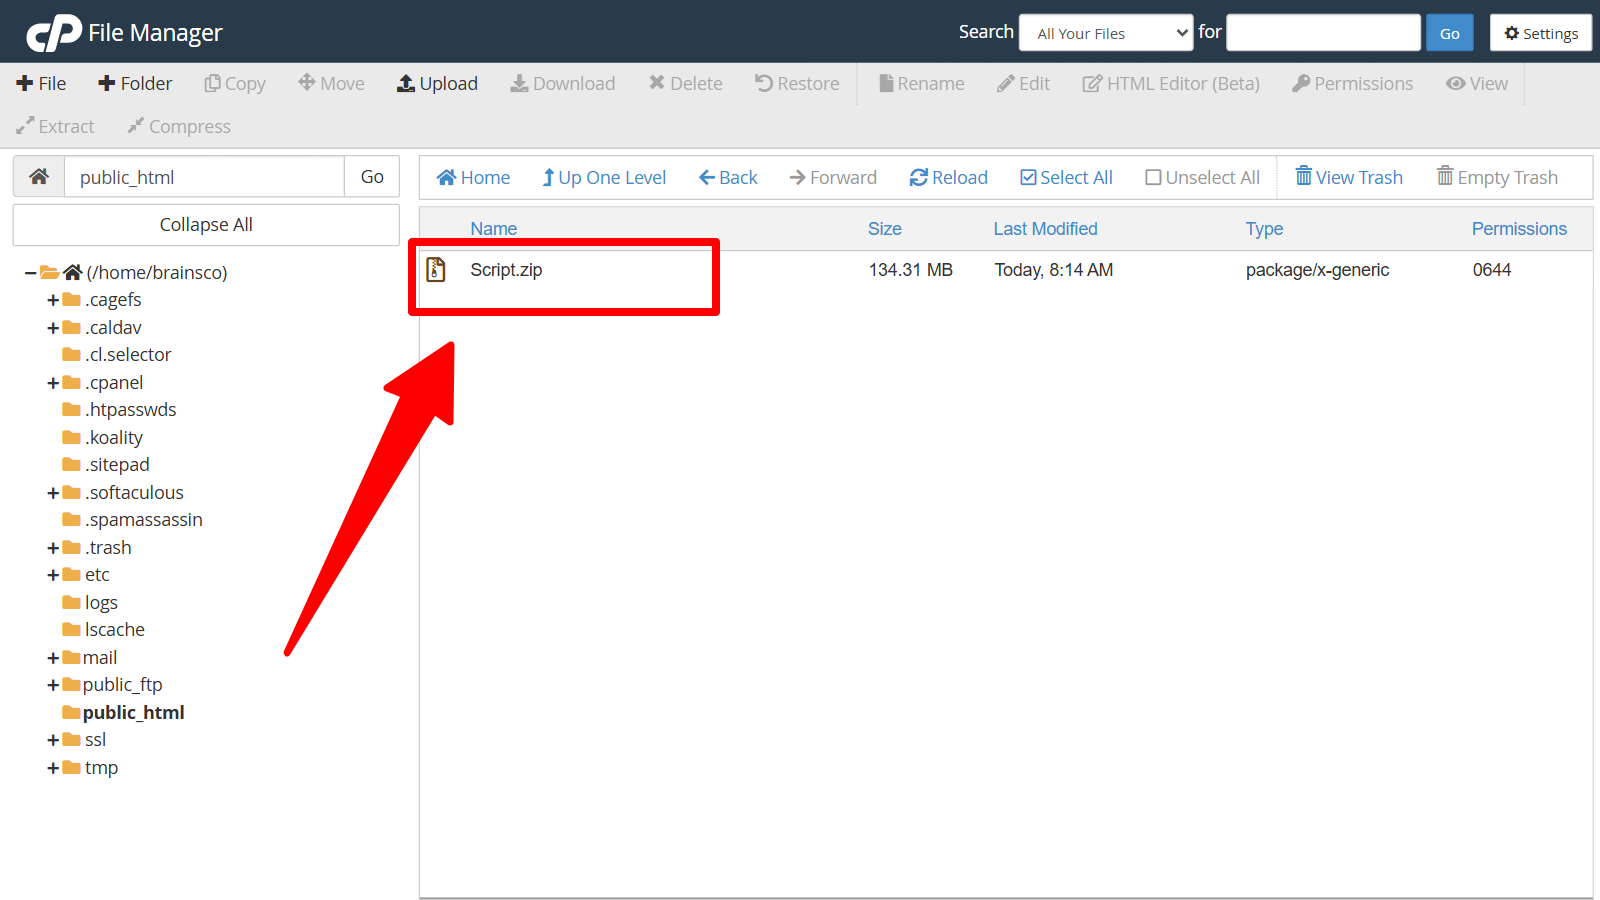
-
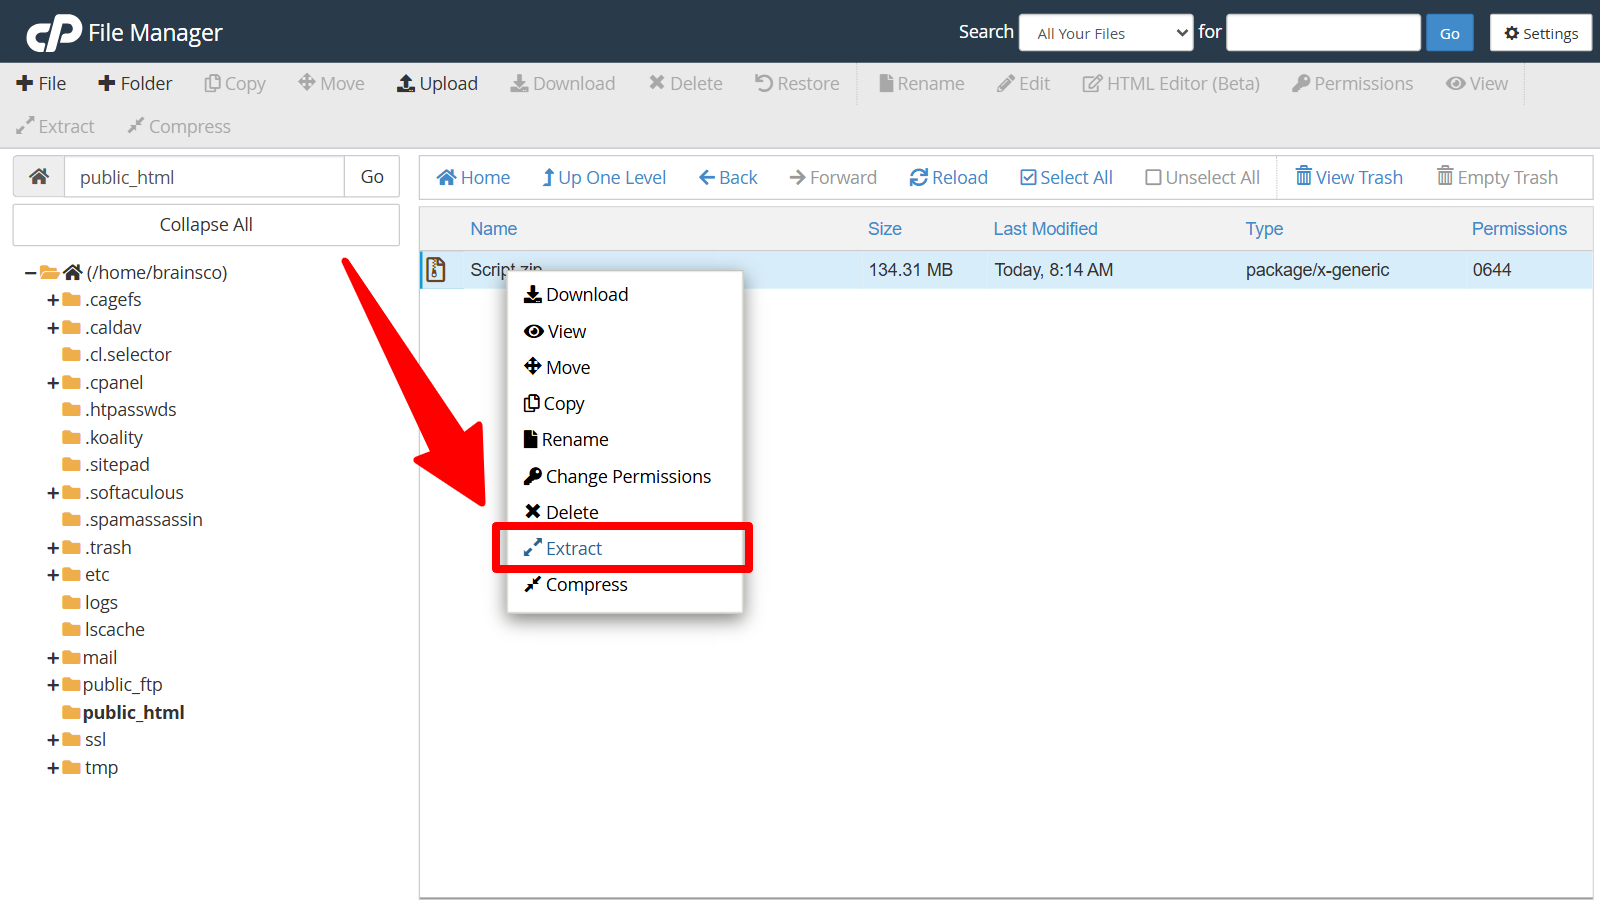
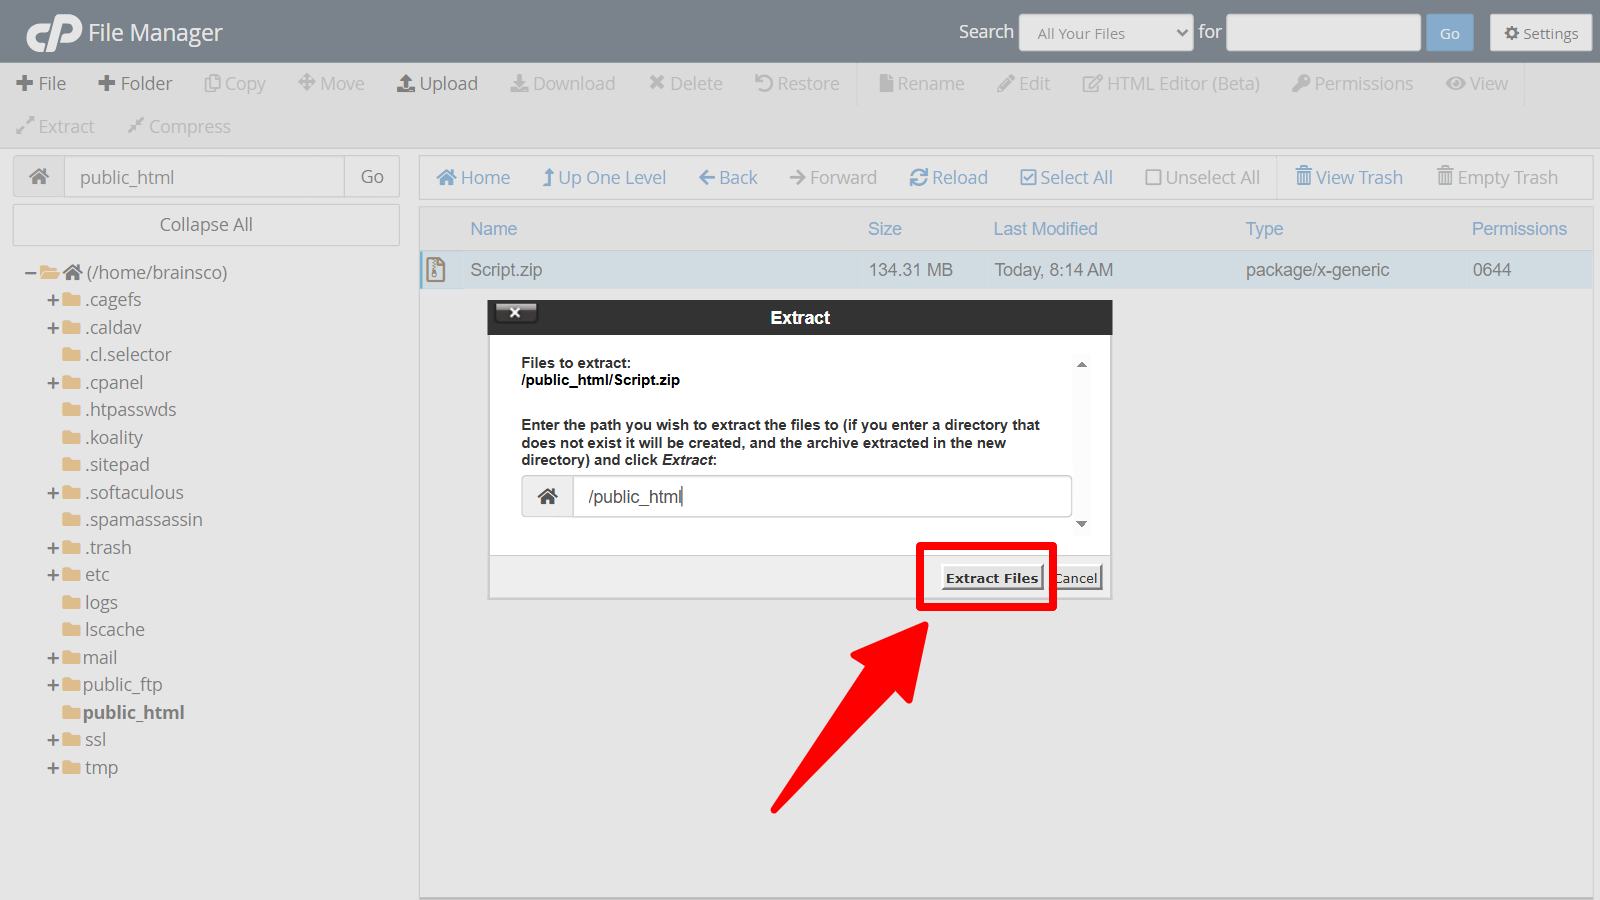
Extract and deploy. On the server, extract Script.zip. Move all files and folders from the resulting Script directory into your chosen installation directory (the document root or subdirectory). Ensure that index.php and .htaccess are included in the move, as they are required for the application to run correctly.

-
Complete setup. Open
http://your-domain/(orhttp://your-domain/your-subdirectory/) in a browser and follow the on-screen installation steps. Once the process finishes, the system is ready for use.